Until Selenium 3, there were 8 ways to locate web elements. Selenium 4 introduced a cool feature called relative locators, making it easier to find elements based on their position instead of just relying on ID or class. This comes in handy when creating a specific locator is tricky.
Understand Relative Locators in Selenium 4
Selenium 4 uses JavaScript to find where elements are on the page, helping us locate nearby elements. Now, let’s dive into the details of Selenium 4 locators.
Locators are like a set of keys to open a lock. The software testers use them to locate web elements to mimic real user-like actions. Let’s find out what is special about them in Selenium’s latest version.
Introduction to Relative Locators
Relative locators are a new way to find web elements by describing their position relative to other elements on the page. Instead of relying on specific attributes like IDs or names, you use natural language terms like “above,” “below,” “to the left of,” or “near.”
Imagine you’re searching for a specific book in a library. You know it’s near a tall stack of cookbooks, but you can’t recall its exact title or location. That’s where relative locators come in for Selenium 4!
Why are They Useful?
How do they work?
Types of Relative Locators in Selenium 4
There are mainly five types of relative locators that are commonly used in various use cases. Let’s discuss each of them in detail.
1. above()
The method above() helps you find elements positioned directly above another known element. This makes it super useful for dynamic websites or when specific IDs or names are unavailable.
Think of it like navigating a bookshelf. You know the book you want is above a specific red hardcover title. You don’t need its exact title, just its relative position. That’s above() in action!
Syntax:
// Java

WebElement ele = driver.findElement(
    RelativeLocator.with(By.tagName("tag_name")).above(refEle)
);
Arguments:
- By.tagName(“tag_name”): Specify the tag name of the element you want to find (e.g., “button”, “p”).
- refEle: This should be an already located element on the page, serving as the reference point.
2. below()
Continuing our journey into Selenium 4’s relative locators, let’s explore below(). It helps you find elements situated directly below another known element. This comes in handy for navigating dynamic websites or when unique identifiers are scarce.
Picture yourself scanning a grocery list. You quickly locate “milk” and need the “eggs” below it. You don’t need the eggs’ exact location, just its relative position. That’s what below() offers!
Syntax:
// Java

WebElement ele = driver.findElement(
    RelativeLocator.with(By.tagName("tag_name")).below(refEle)
);
Arguments:
- By.tagName(“tag_name”): Specify the tag name of the element you want to find (e.g., “input”, “span”).
- refEle: This should be an already located element on the page, serving as the reference point.
3. toLeftOf()
This method enables you to pinpoint elements positioned directly to the left of another known element. It comes in handy when dealing with dynamic websites or elements lacking unique identifiers.
Imagine flipping through a magazine. You see an interesting article and want to find the caption, which you know is to its left. You don’t need the caption’s specific location, just its relative position. That’s how toLeftOf() functions!
Syntax:
// Java

WebElement ele = driver.findElement(
    RelativeLocator.with(By.tagName("tag_name")).toLeftOf(refEle)
);
Arguments:
- By.tagName(“tag_name”): Specify the tag name of the element you want to find (e.g., “p”, “div”).
- refEle This should be an already located element on the page, serving as the reference point.
4. toRightOf()
This method helps you find elements situated directly to the right of another known element. It becomes valuable when dealing with dynamic websites or elements lacking unique identifiers.
Picture yourself scanning a newspaper. You see a captivating headline and want to find the accompanying image, which you know is to its right. You don’t need the image’s precise location, just its relative position. That’s what toRightOf() offers!
Syntax:
// Java

WebElement ele = driver.findElement(
    RelativeLocator.with(By.tagName("tag_name")).toRightOf(refEle)
);
5. near()
This method lets you discover elements positioned within a certain distance from another known element. It comes in handy when the element you seek lacks a distinct identifier or has a dynamic location relative to its surrounding elements.
Imagine searching for a specific book on a cluttered bookshelf. You remember it’s near a large encyclopedia but can’t recall its exact placement. That’s where near() comes in! It allows you to find elements based on their proximity to a reference element.
Syntax:
// Java

WebElement ele = driver.findElement(
    RelativeLocator.with(By.tagName("tag_name")).near(refEle, distInPix)
);
Arguments:
- By.tagName(“tag_name”): Specify the tag name of the element you want to find (e.g., “p”, “a”).
- refEle: This is the starting point for your search, an already located element on the page.
- distInPix (optional): This defines the maximum distance (in pixels) from the reference element where the target element can be located. The default value is 50 pixels.
Selenium 4 Relative Locators Demo
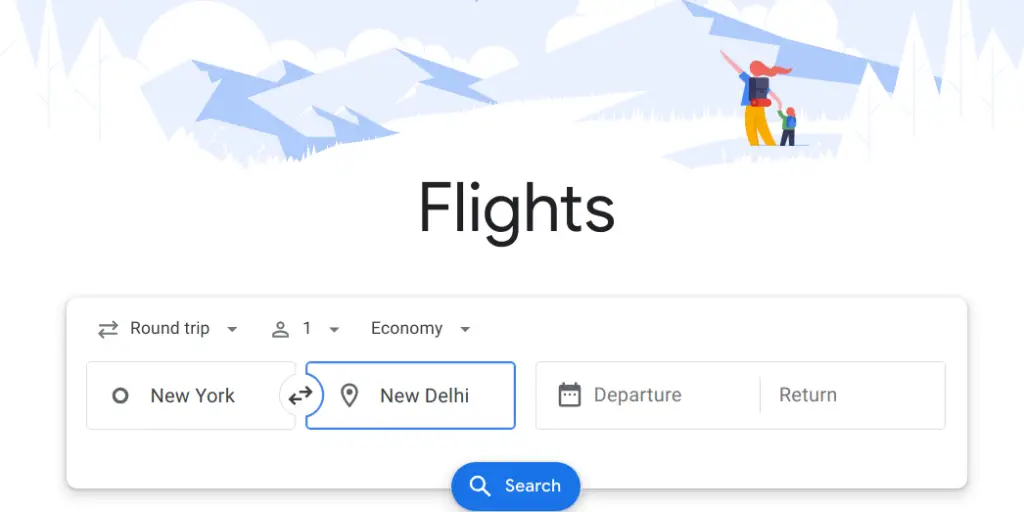
In this example, we’ll automate booking a flight on a fictional travel website using some of these relative locators in Selenium 4:
Scenario: Search for a round-trip flight from San Francisco (SFO) to New York (JFK) departing on March 20th, 2024, and returning on March 25th, 2024.
Website: https://www.google.com/travel/flights
Assumptions:
- You have already set up JDK, we used Java 17 to test it.
- You have the Selenium version 4 downloaded. We tested using the latest Selenium jars.
Code:
import org.openqa.selenium.*;
import org.openqa.selenium.chrome.ChromeDriver;
import org.openqa.selenium.support.locators.RelativeLocator;
import org.openqa.selenium.support.ui.*;
import java.time.Duration;

public class GoogleFlightsBooking {
    public static void main(String[] args) {
        // Change the path of driver as per your system
        String drvType = "webdriver.chrome.driver";
        String drvPath = "/opt/chromedriver/chromedriver";
        System.setProperty(drvType, drvPath);

        // Create the driver object
        WebDriver driver = new ChromeDriver();

        // Navigate to the Google Flights page
        driver.get("https://www.google.com/travel/flights");

        // Book a flight from New York
        bookFlight(driver, "//*[@id='i21']/div[1]/div/div/div[1]/div/div/input", "New York", "//*[@id='c2']");

        // Book a return flight from New Delhi
        bookFlight(driver, "//*[@id='i21']/div[4]/div/div/div[1]/div/div/input", "New Delhi", "//*[@id='c44']");

        // Add more code for other RelativeLocator strategies and booking actions

        // Pause for a moment before quitting (for manual verification)
        try {
            Thread.sleep(5000);
        } catch (InterruptedException e) {
            e.printStackTrace();
        }

        // Close the WebDriver
        driver.quit();
    }

    private static void bookFlight(WebDriver driver, String inputXpath, String location, String loc2) {
        // Find the origin input field
        WebElement originInput = new WebDriverWait(driver, Duration.ofSeconds(10))
                .until(ExpectedConditions.visibilityOfElementLocated(By.xpath(inputXpath)));

        // Clear existing content and set new value in the origin input field
        originInput.clear();
        originInput.sendKeys(location);

        // Wait for the dropdown suggestions to appear
        WebDriverWait wait = new WebDriverWait(driver, Duration.ofSeconds(10));
        WebElement firstSuggestion = wait.until(ExpectedConditions.visibilityOfElementLocated(RelativeLocator
                .with(By.xpath(loc2))
                .below(originInput)));

        // Click on the first suggestion
        firstSuggestion.click();
    }
}
Please note that we only did a few of the first steps to book a flight like selecting the source and destination. This is a fully working sample, so you can enhance it further. If you wish, submit it to us and we can review your code.
Covering the whole booking flow is beyond the scope of this tutorial. However, if you want us to cover the complete booking flow, then do let us know via comments.
More Reference
Refer to these awesome tutorials for additional perspective.
Must Read:
1. Selenium Version 4 Features – What’s New?
2. How to Generate Report in Selenium Webdriver?
3. How to Generate Extent Reports in Selenium?
4. How do I Merge Two Extent Reports?
5. How to Zoom In/Out in Selenium Webdriver Using Java?
6. Random API for Postman to Generate Random Inputs
7. Differences Between Extent Report and Allure Report
8. How to Inspect Element on Mac, Android, and iPhone
Remember, this is just a starting point, and you’ll need to adjust the locators and steps based on the actual website’s structure and layout. Real-device testing is also crucial for reliable automation on live websites.
Happy automating!


